Camp storage / 5 min read
Camp storage and organization for weekend trips
Organize your vehicle for arrival, meals, and the drive home. Choose bins, dry bags, and cord ties around the gear you actually carry.
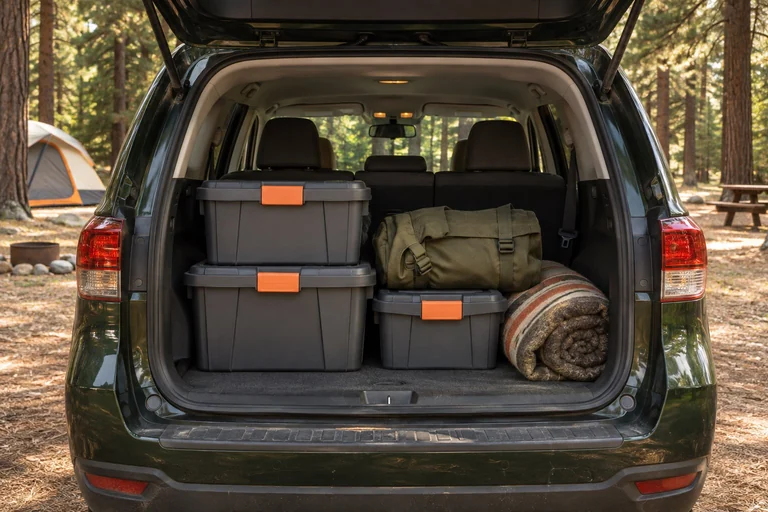
Sort by when you need the gear
Start with a walk through the weekend. Write down what you will reach for when you arrive, while you cook, at bedtime, and while you pack up. Give each task its own group of gear. Put the items you need first near the cargo opening. A tent stake pouch, light, and rain layer can share an arrival group even though you store them in different places at home.
Keep first aid and roadside gear accessible whenever the vehicle is loaded. Ask someone else to find them with the hatch open and the rest of the gear in place. If they need to move a cooler or several bins, change the layout. Put the same items in the same spot on the way home so they are still easy to reach.
Choose containers around the contents
Spread out one group of gear and measure its longest and widest pieces. Measure at the bottom of the container if it tapers. Check that a lid opens with the bin where you will use it. A 15 qt Sterilite ClearView box works for small dry items you want to see at a glance. A wider rigid bin such as the 24-gallon ActionPacker can group bulkier equipment if you can lift it when full.
For a two-night trip, try three groups before adding more. Put the tent and setup supplies closest to the hatch, with the lighting and rain layers where you can grab them. Keep clean bedding together in the area that stays dry. Put the kitchen kit where you can remove it once, open it at the table, and close it after the meal. Check the order by pretending to arrive in the rain. If you have to set dry bedding on the ground to reach the tent, swap their positions.
Use a smaller case such as the YETI GoBox 15 if separate dividers or trays make it easier to keep small items in place. Before buying another container, try the layout with boxes you already own. Load them into the vehicle, open each one, and check that the hatch, seats, and passenger space still work as intended. Label the end of each bin that faces the hatch so the label stays visible when bins are packed side by side.
Give damp gear and cables their own places
Keep dry bedding and clothes apart from wet towels, muddy shoes, and the rainfly. Reserve a bag or washable bin for damp gear on the drive home. A 13 L Sea to Summit Lightweight Dry Bag can hold small soft items. Leave room for the roll top and keep it away from sharp stakes or utensils. A fabric waterproof rating does not tell you how the closure will perform when submerged.
Coil unplugged cords loosely according to the equipment maker’s instructions. A 12 in. Nite Ize Gear Tie can keep a coil from tangling with the rest of the bin. Store cords where you can see which device they belong to. Keep wet lines apart from chargers and other electronics. Empty the damp bag when you get home and let the gear dry before storing it.
Secure the load and check access
Check your vehicle’s loading instructions and weight limits with passengers and gear included. Use the restraint points and equipment specified for the vehicle and load. A latching lid keeps a bin closed for ordinary handling. It does not secure the bin to the vehicle. A cable organizer also does not act as a cargo restraint.
Pack heavy items low where they can be restrained and kept from moving. Check how the load might shift on a hard stop or turn and correct any loose items before driving. Keep emergency gear reachable, and make sure the driver can see and the doors and hatch close properly. If you change the load after a stop, check it again.
Plan the setup at camp and the reset at home
Decide where each group goes at camp and who can return it to that spot. Use the local rules for food, trash, and scented items, including toiletries. Where a campground requires a food locker or an approved container, plan that space before leaving. Ordinary camp bins, coolers, and dry bags do not establish compliance with those rules.
Pack the first-use gear so it will be accessible on the next arrival. At home, empty wet and dirty gear, refill what you used, and remove items that never left the bin. Record any missing piece on the checklist before putting the setup away. After a few trips, combine groups that always move together and split any bin that is awkward to lift.
Storage and organization checklist
Run through the checklist with the vehicle loaded so you can find access problems before you leave.
- Label gear by task and make arrival and emergency equipment reachable.
- Measure the contents, cargo opening, and space to open each lid.
- Pack separate storage for dry bedding, damp gear, and cords.
- Check cargo weight, restraint points, and the loaded arrangement.
- Confirm local rules for food, trash, and other scented items.
Sources & further reading
These sources support the factual reference points in this guide. Practical comparisons and packing suggestions are editorial guidance.